After having successfully filed your income tax return, the next step is to verify it. The Income Tax Department starts processing your return, once it is verified. Refunds, if any, are processed for returns that have been submitted and verified.
TAXAJ recommends e-verifying your tax returns by using your Internet Banking Option. It is the easiest and the fastest way to verify your tax return.
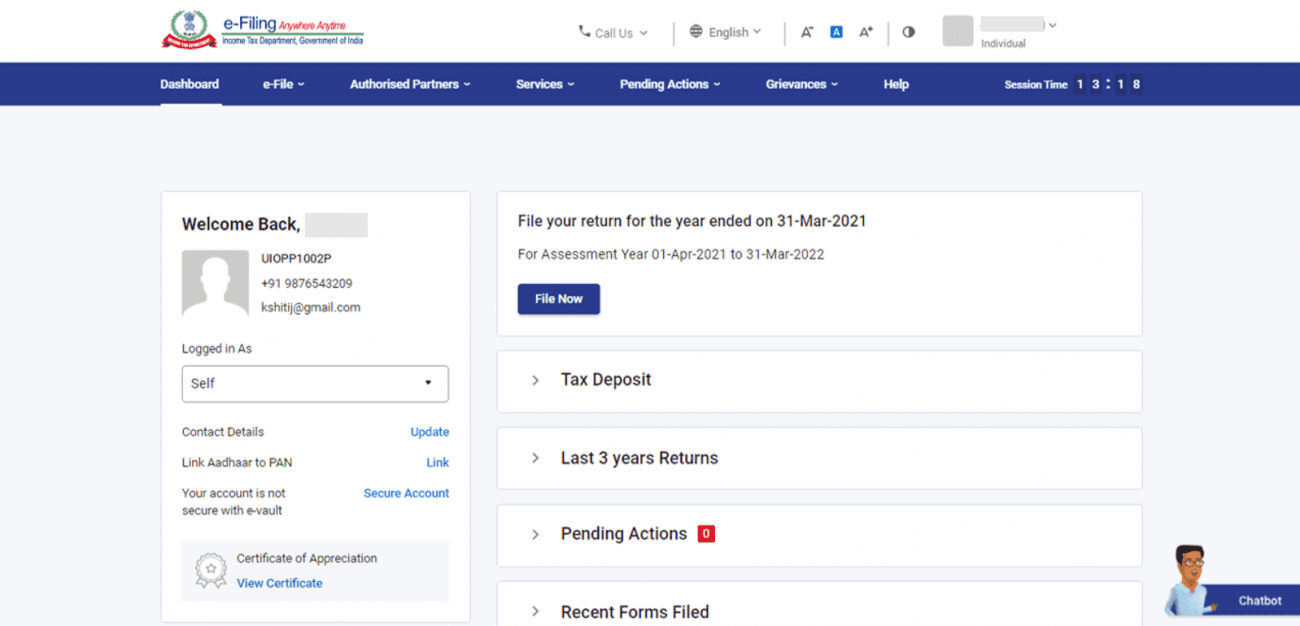
Step-by-step guide to E-verification:
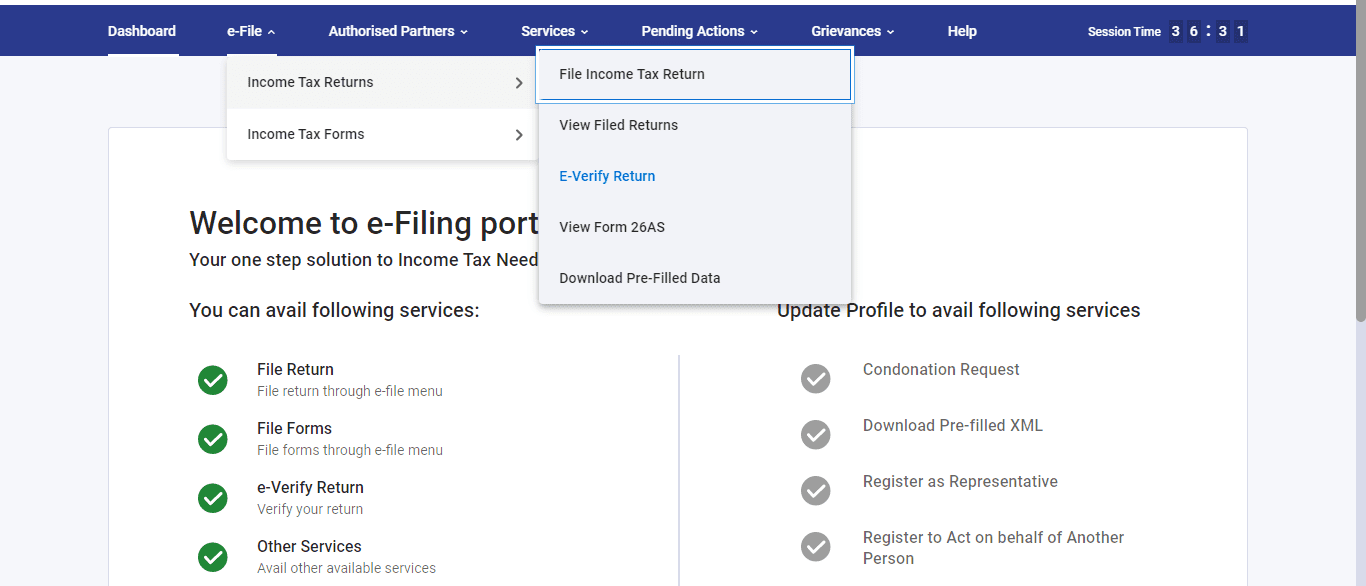
Step 2: Go to E-file, then Income tax returns and click on E-verify Return.
1. E-verify using Digital Signature Certificate (DSC)
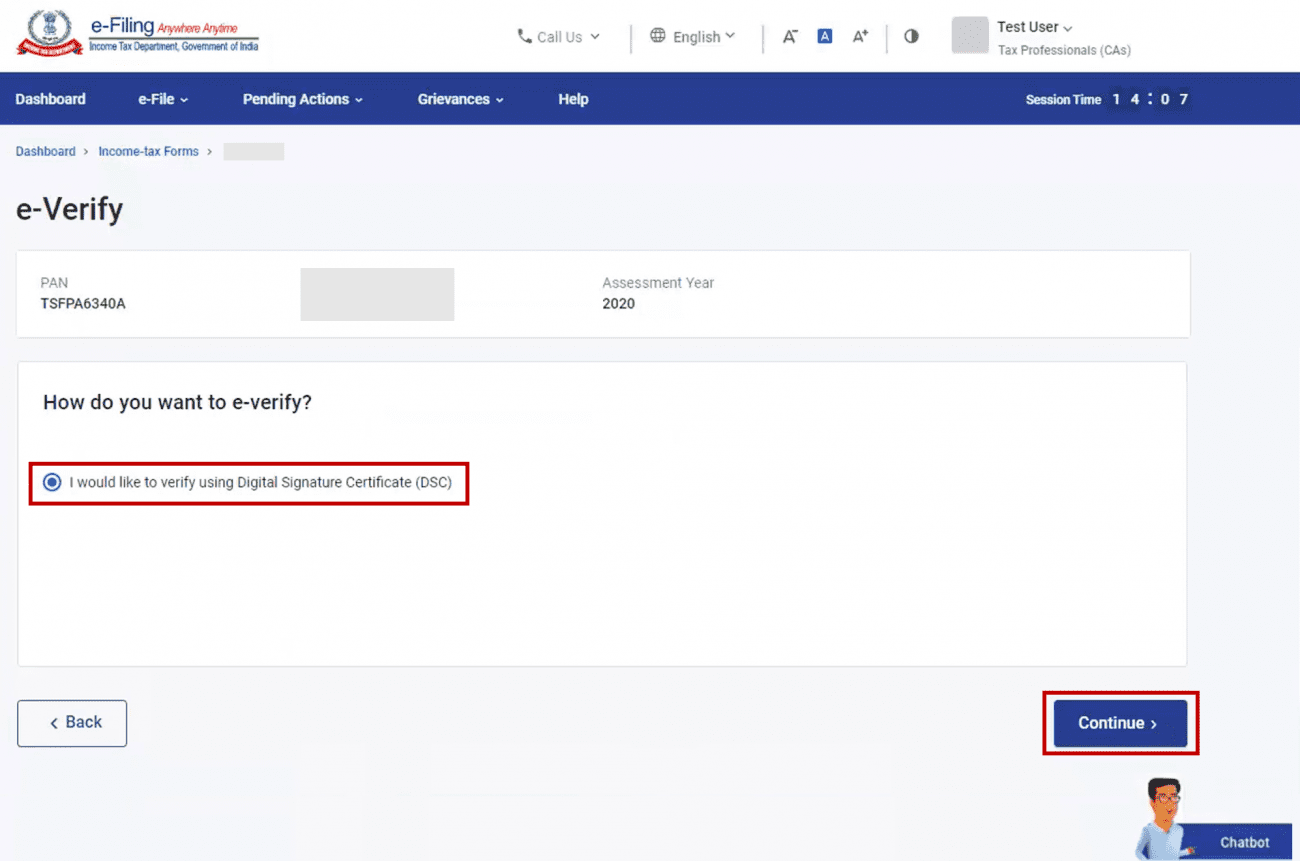
Step 1: On the e-Verify page, select I would like to e-Verify using Digital Signature Certificate (DSC).
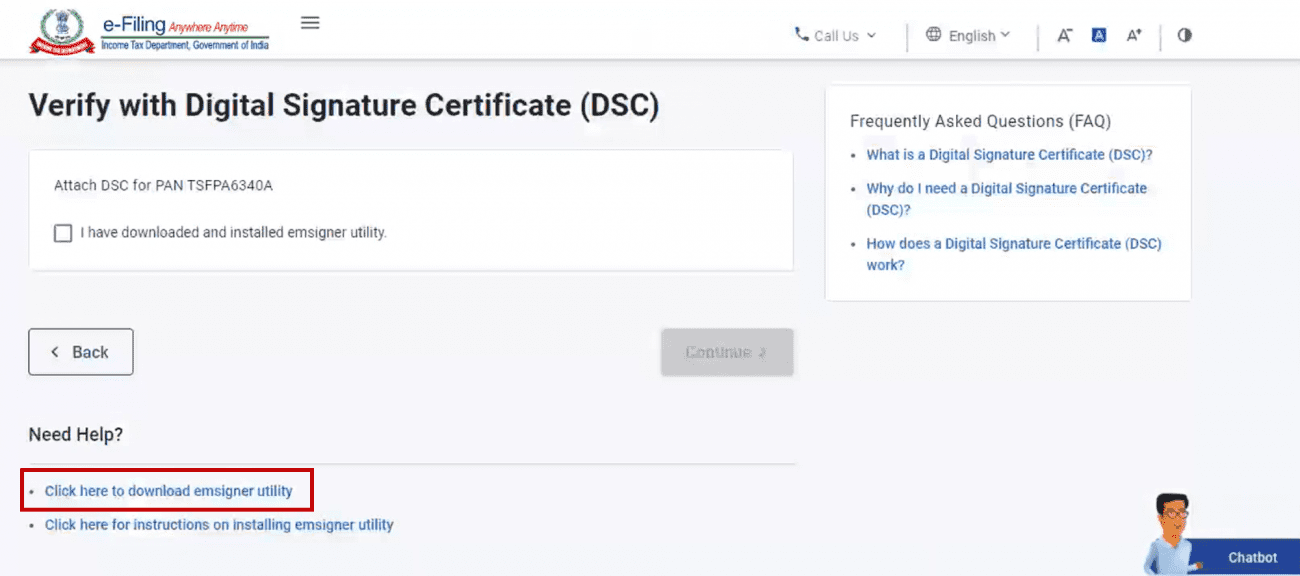
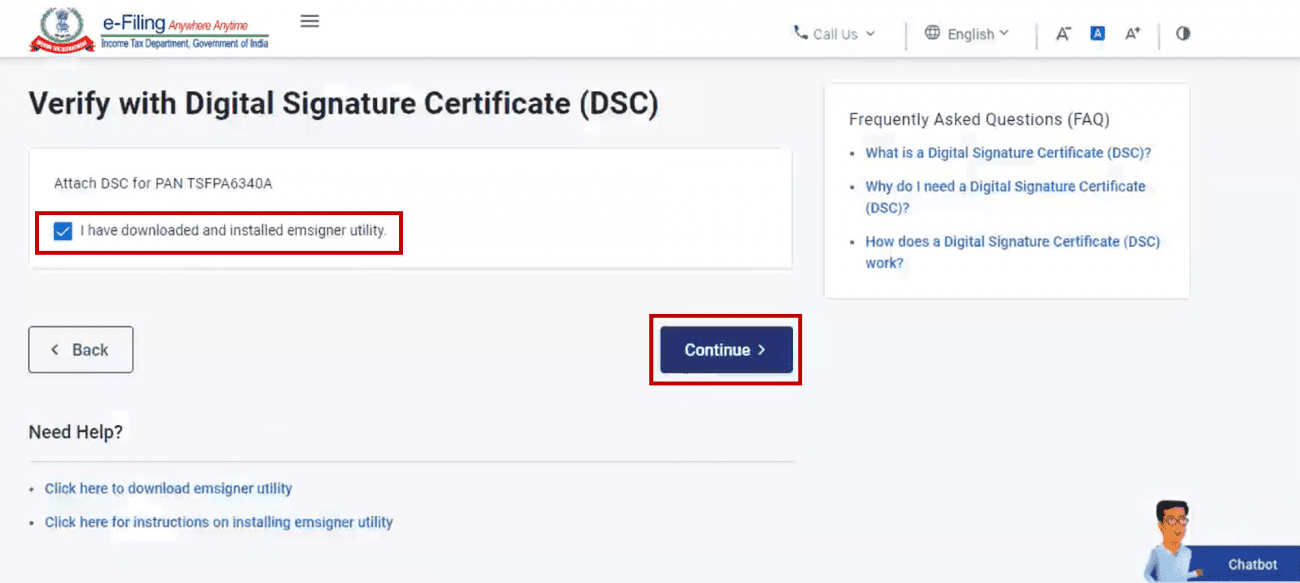


Step 2: On the Verify Your Identity page, select Click here to download emsigner utility.
Step 3: After the download and installation of emsigner utility is complete, select I have downloaded and installed emsigner utility on the Verify Your Identity page and click Continue.
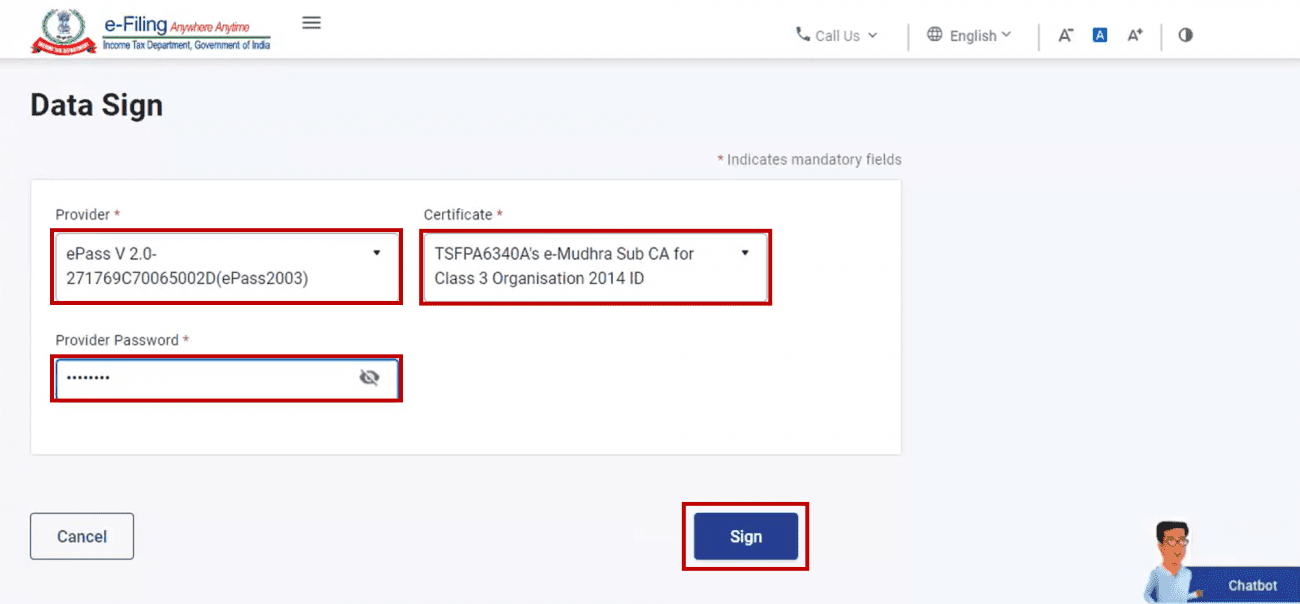
Step 4: On the Data Sign page, select your Provider, Certificate and enter the Provider Password. Click Sign.
A success message page is displayed along with a Transaction ID. Please keep a note of the Transaction ID for future reference. You will also receive a confirmation message on your email ID and mobile number registered on the e-Filing portal.
2. E-verify after generating Aadhar OTP
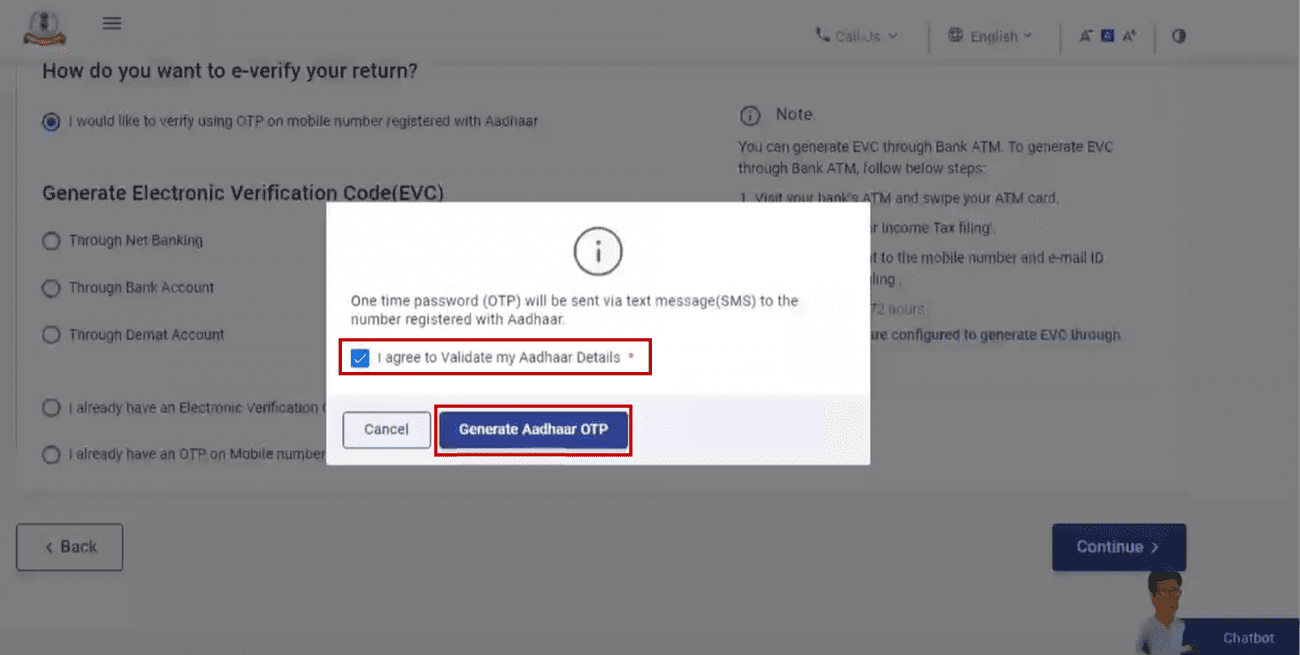
Step 1: On the e-Verify page, select I would like to verify using OTP on mobile number registered with Aadhaar and click Continue.
Step 2: On the Aadhaar OTP page, select the I agree to validate my Aadhaar Details checkbox and click Generate Aadhaar OTP.
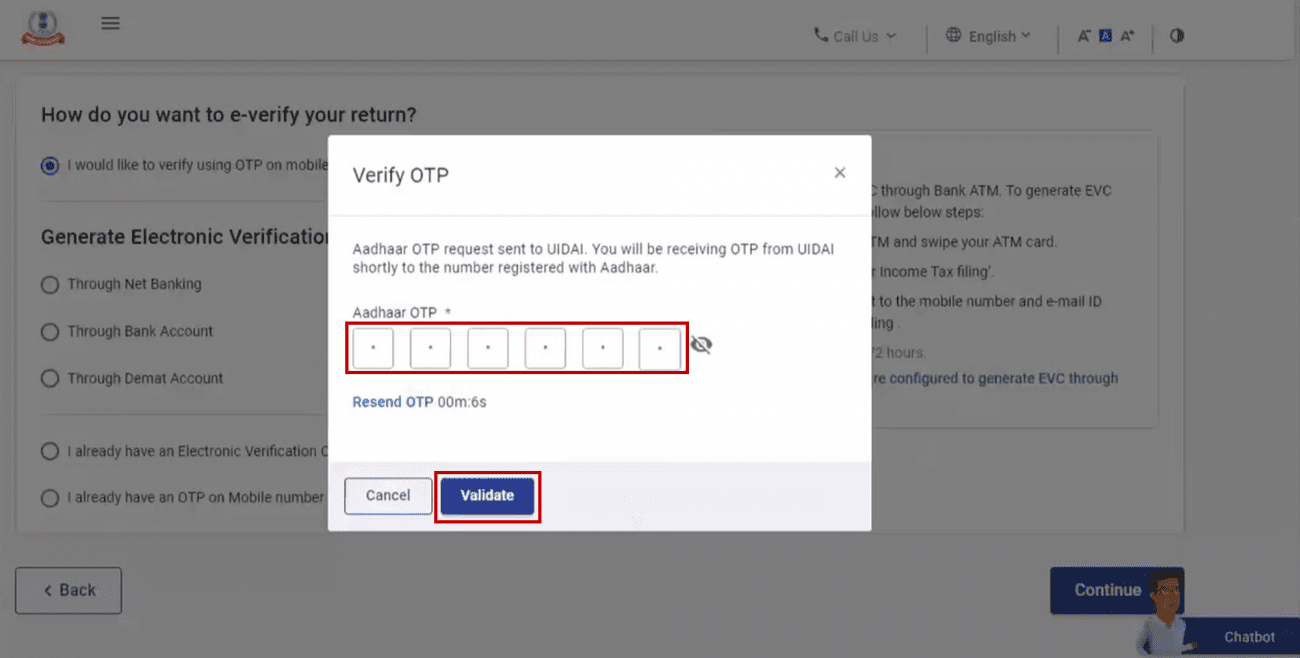
Step 3: Enter the 6-digit OTP received on your mobile number registered with Aadhaar and click Validate.
Note:
- OTP will be valid for 15 minutes only.
- You have 3 attempts to enter the correct OTP.
- The OTP expiry countdown timer on screen tells you when the OTP will expire.
- On clicking Resend OTP, a new OTP will be generated and sent.
A success message page is displayed along with a Transaction ID. Please keep a note of the Transaction ID for future reference. You will also receive a confirmation message on your email ID and mobile number registered on the e-Filing portal.
3. E-verify using existing Aadhar OTP
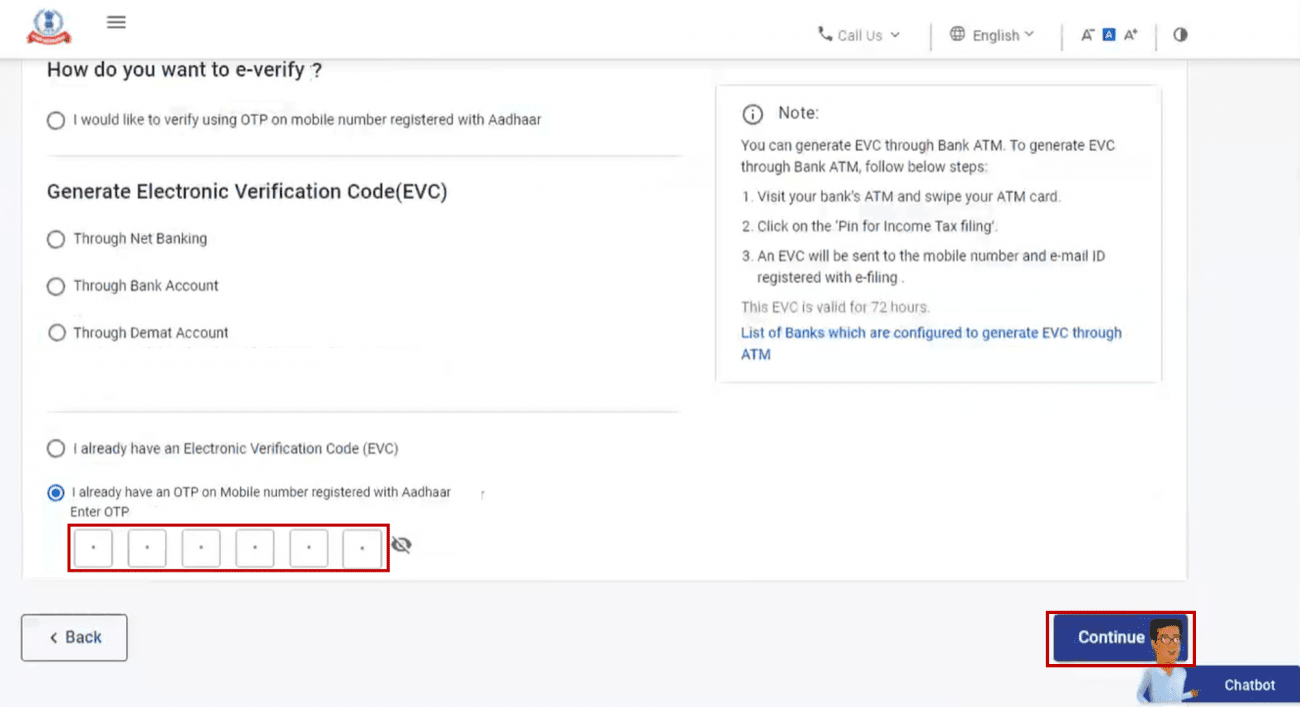
Step 1: On the e-Verify page, select I already have an OTP on Mobile number registered with Aadhaar.
Step 2: Enter the 6-digit OTP available with you and click Continue.
Note:
- OTP will be valid for 15 minutes only.
- You have 3 attempts to enter the correct OTP.
- The OTP expiry countdown timer on screen tells you when the OTP will expire.
- On clicking Resend OTP, a new OTP will be generated and sent.
A success message page is displayed along with a Transaction ID. Please keep a note of the Transaction ID for future reference. You will also receive a confirmation message on your email ID and mobile number registered on the e-Filing portal.
4. E-Verify using existing Electronic Verification Code (EVC)
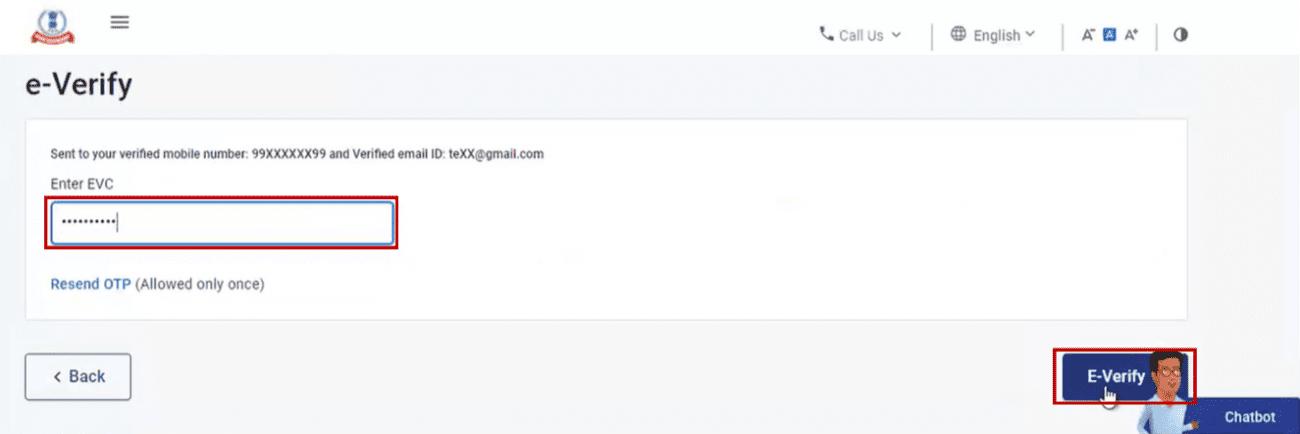
Step 1: On the e-Verify page, select I already have an Electronic Verification Code (EVC).

Step 2: Enter EVC in the Enter EVC textbox and click Continue.
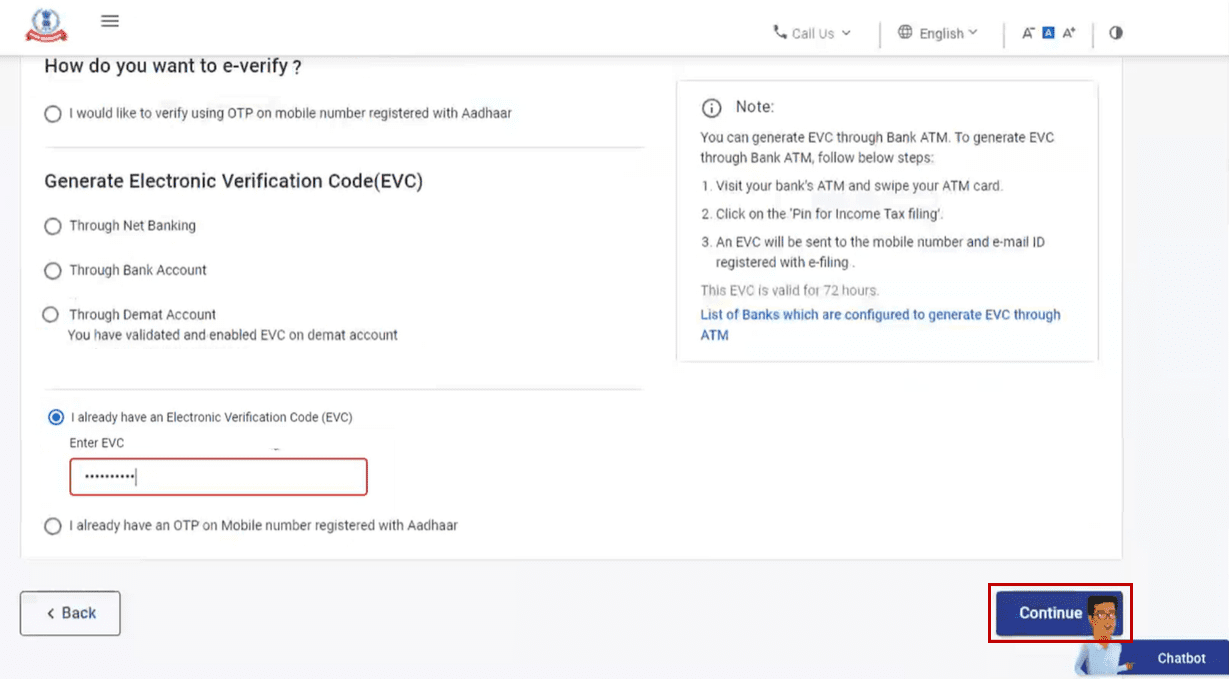
A success message page is displayed along with a Transaction ID and EVC. Please keep a note of the Transaction ID and EVC for future reference. You will also receive a confirmation message on your email ID and mobile number registered on the e-Filing portal.
5. E-Verify after generating Electronic Verification Code (EVC) through Bank Account
Step 1: On the e-Verify page, select Through Bank Account and click Continue.
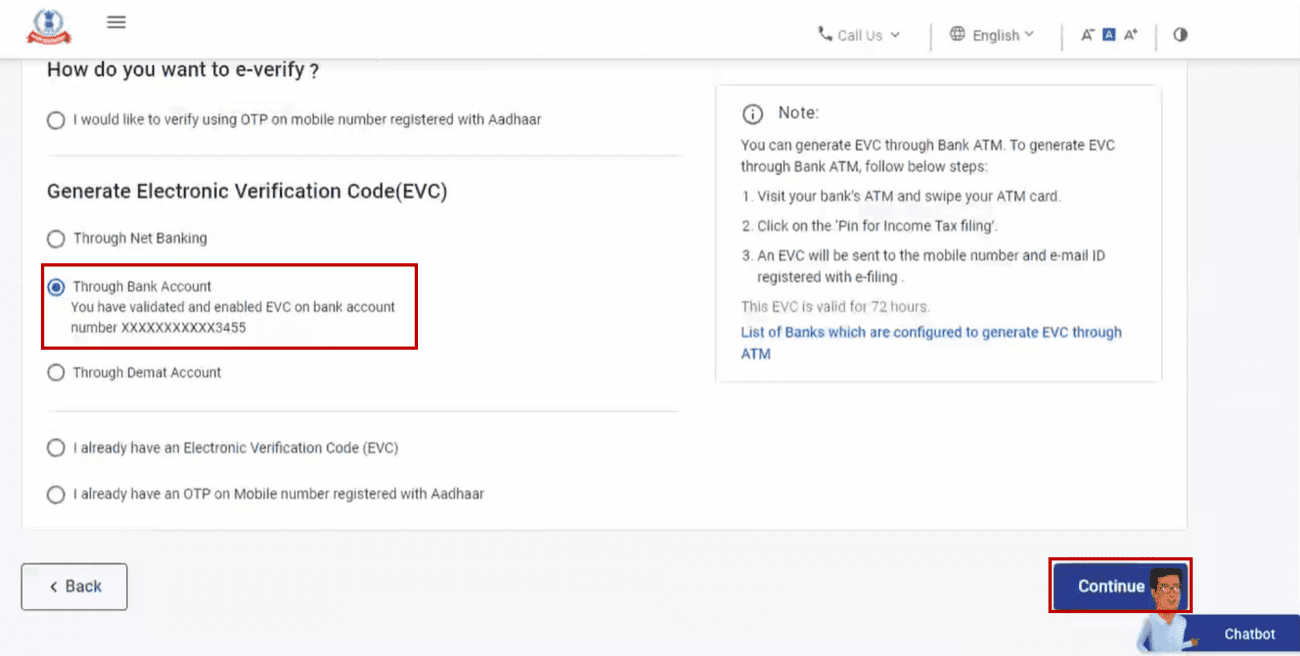
Note:
- EVC will be generated and will be sent to your mobile number and email ID registered with your pre-validated and EVC enabled bank account.
- If you have not pre-validated your Bank Account yet, pre-validate and EVC-enable your bank account.
Step 2: Enter the EVC received on your mobile number and email ID registered with your bank account in the Enter EVC textbox and click e-Verify.

A success message page is displayed along with a Transaction ID and EVC. Please keep a note of the Transaction ID and EVC for future reference. You will also receive a confirmation message on your email ID and mobile number registered on the e-Filing portal.
6. E-Verify after generating Electronic Verification Code (EVC) through Demat Account
Step 1: On the e-Verify page, select Through Demat Account and click Continue.
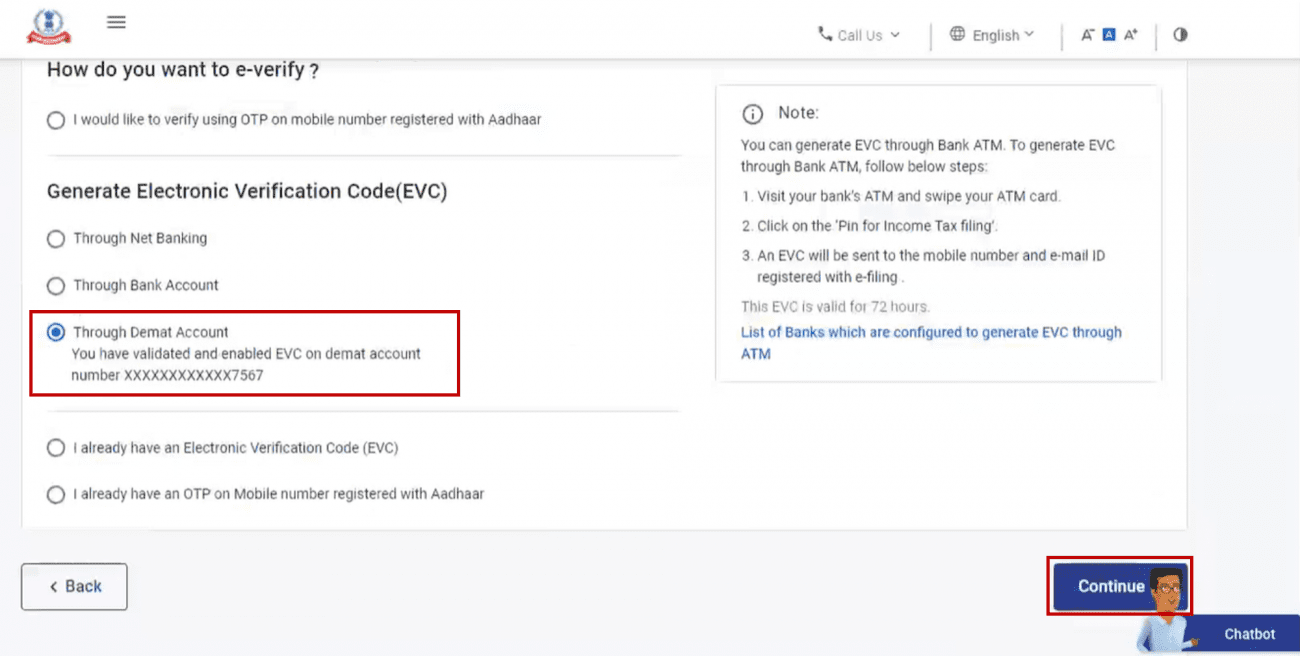
Note:
- EVC will be generated and will be sent to your mobile number and email ID registered with your pre-validated and EVC-enabled demat account.
- If you have not pre-validated your demat account yet, pre-validate and EVC-enable your demat account.
Step 2: Enter the EVC received on your mobile number and email ID registered with your demat account in the Enter EVC textbox and click e-Verify.
A success message page is displayed along with a Transaction ID and EVC. Please keep a note of the Transaction ID and EVC for future reference. You will also receive a confirmation message on your email ID and mobile number registered on the e-Filing portal.
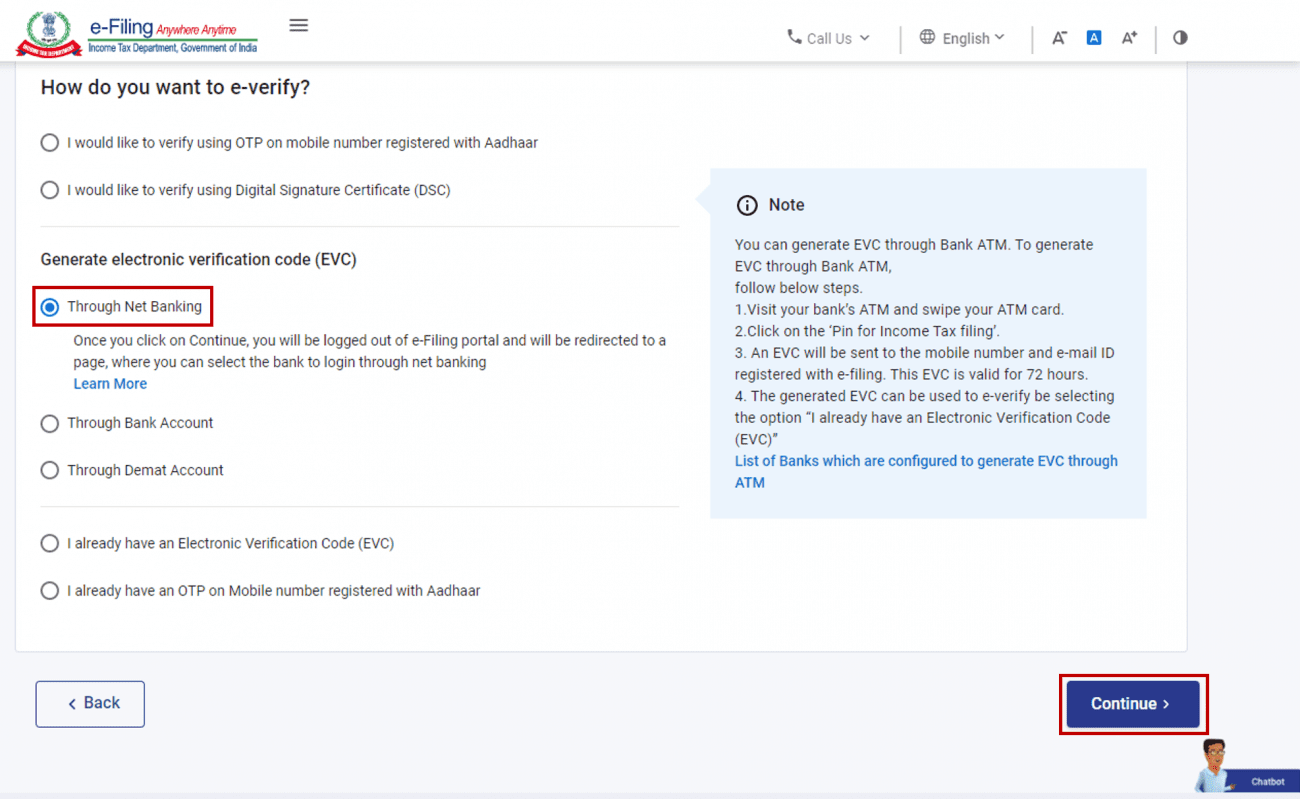
7. E-Verify using Net Banking
Step 1: On the e-Verify page, select Through Net Banking and click Continue.
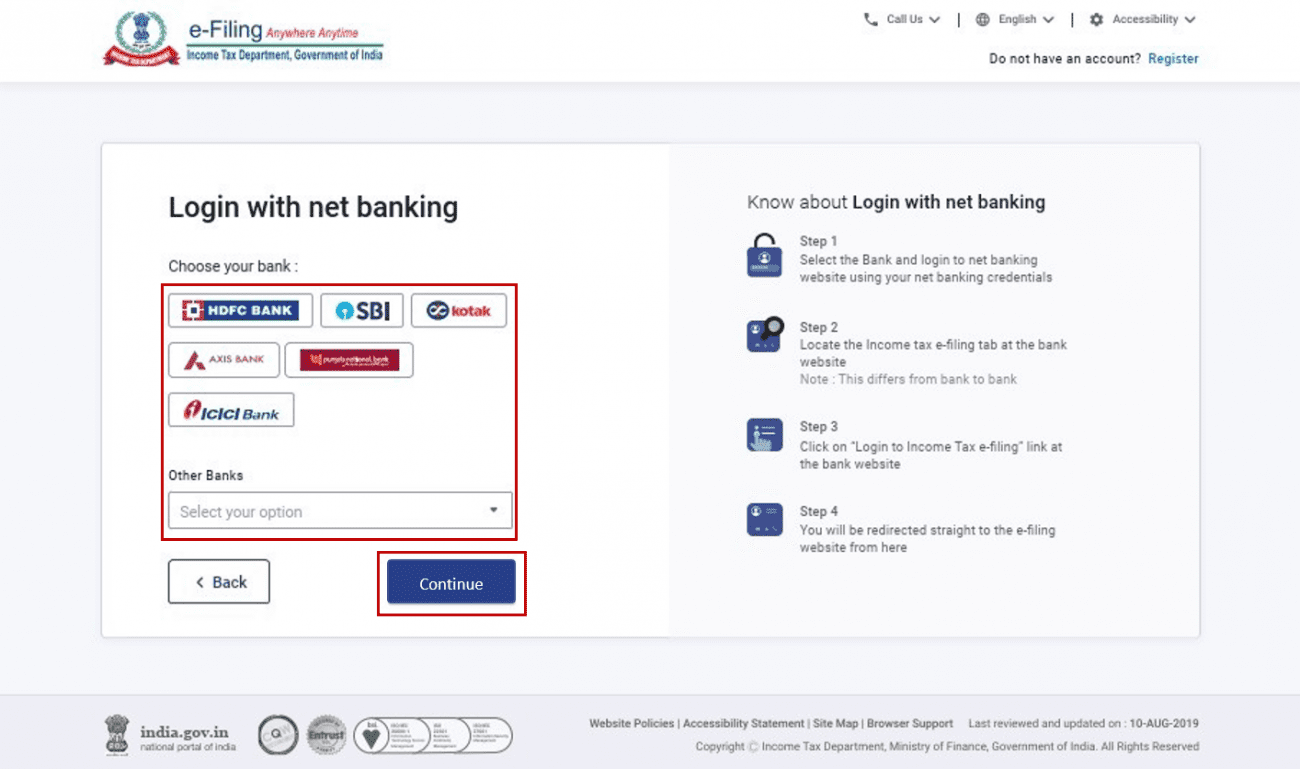
Step 2: Select the bank through which you want to e-Verify and click Continue.
Step 3: Read and understand the disclaimer. Click Continue.
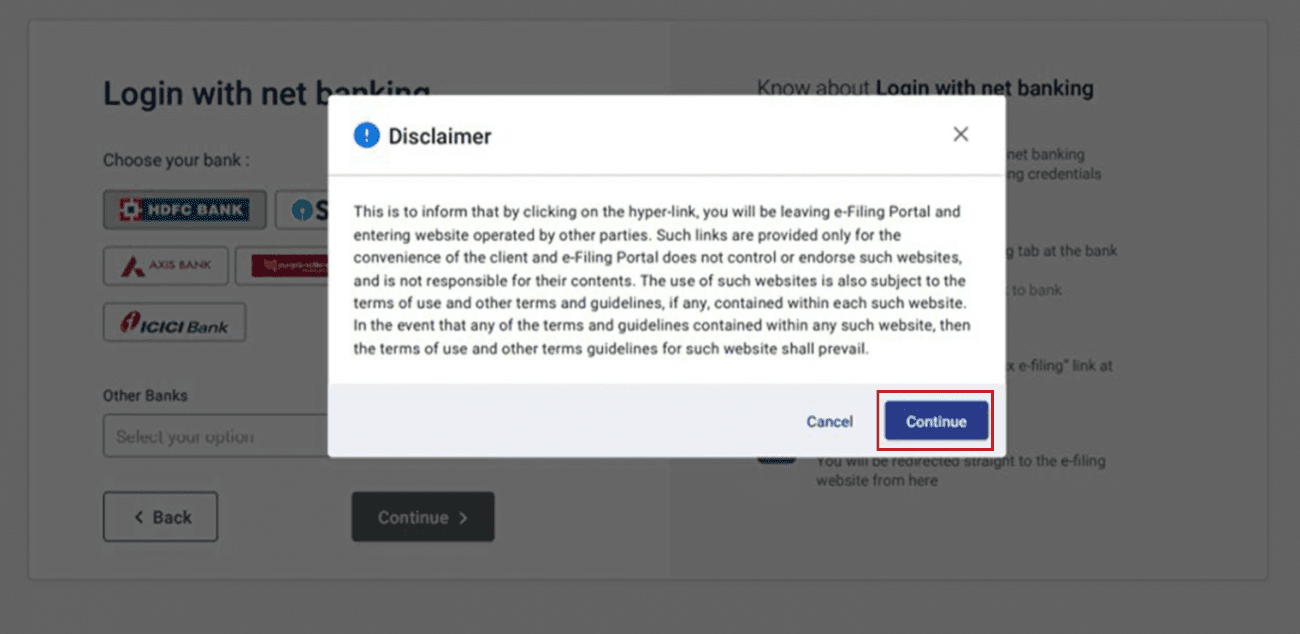
Note: After this, you will be taken to the Net Banking login page of your Bank Account.
Step 4: Log in to your Net Banking using your Net Banking user ID and password.
Step 5: Click the link to log in to e-Filing from your bank's website.
Note: You will be logged out of internet banking, and logged in to the e-Filing portal.
Step 6: On successful login, you will be taken to the e-Filing Dashboard. Go to the respective ITR / Form / service and click e-Verify. Your ITR / Form / Service will be e-Verified successfully.
A success message page is displayed along with a Transaction ID. Please keep a note of the Transaction ID for future reference. You will also receive a confirmation message on your email ID and mobile number registered on the e-Filing portal.
8. Generate Electronic Verification Code (EVC) through Bank ATM (Offline Method)
Step 1: Visit your bank’s ATM and swipe your ATM card.
Note: The service to generate EVC through Bank ATM is provided by certain banks only.
Step 2: Enter PIN.
Step 3: Select Generate EVC for Income tax Filing.
An EVC will be sent to your mobile number and email ID registered with the e-Filing portal.
Note:
- You must have linked the PAN with your respective bank account and the same PAN should be registered with e-Filing portal.
- List of Banks through which you can generate EVC through Bank ATM option - Axis Bank Ltd, Canara Bank, Central Bank of India, ICICI Bank, IDBI Bank, Kotak Mahindra Bank and State Bank of India.
Step 4: The generated EVC can be used to e-Verify the return by selecting I already have an Electronic Verification Code (EVC) as a preferred choice of e-Verification. Refer to Section 4 Existing EVC to complete the process.